
Upload photos, or build from scratch?
By the OFMAI Team · Updated October 2026
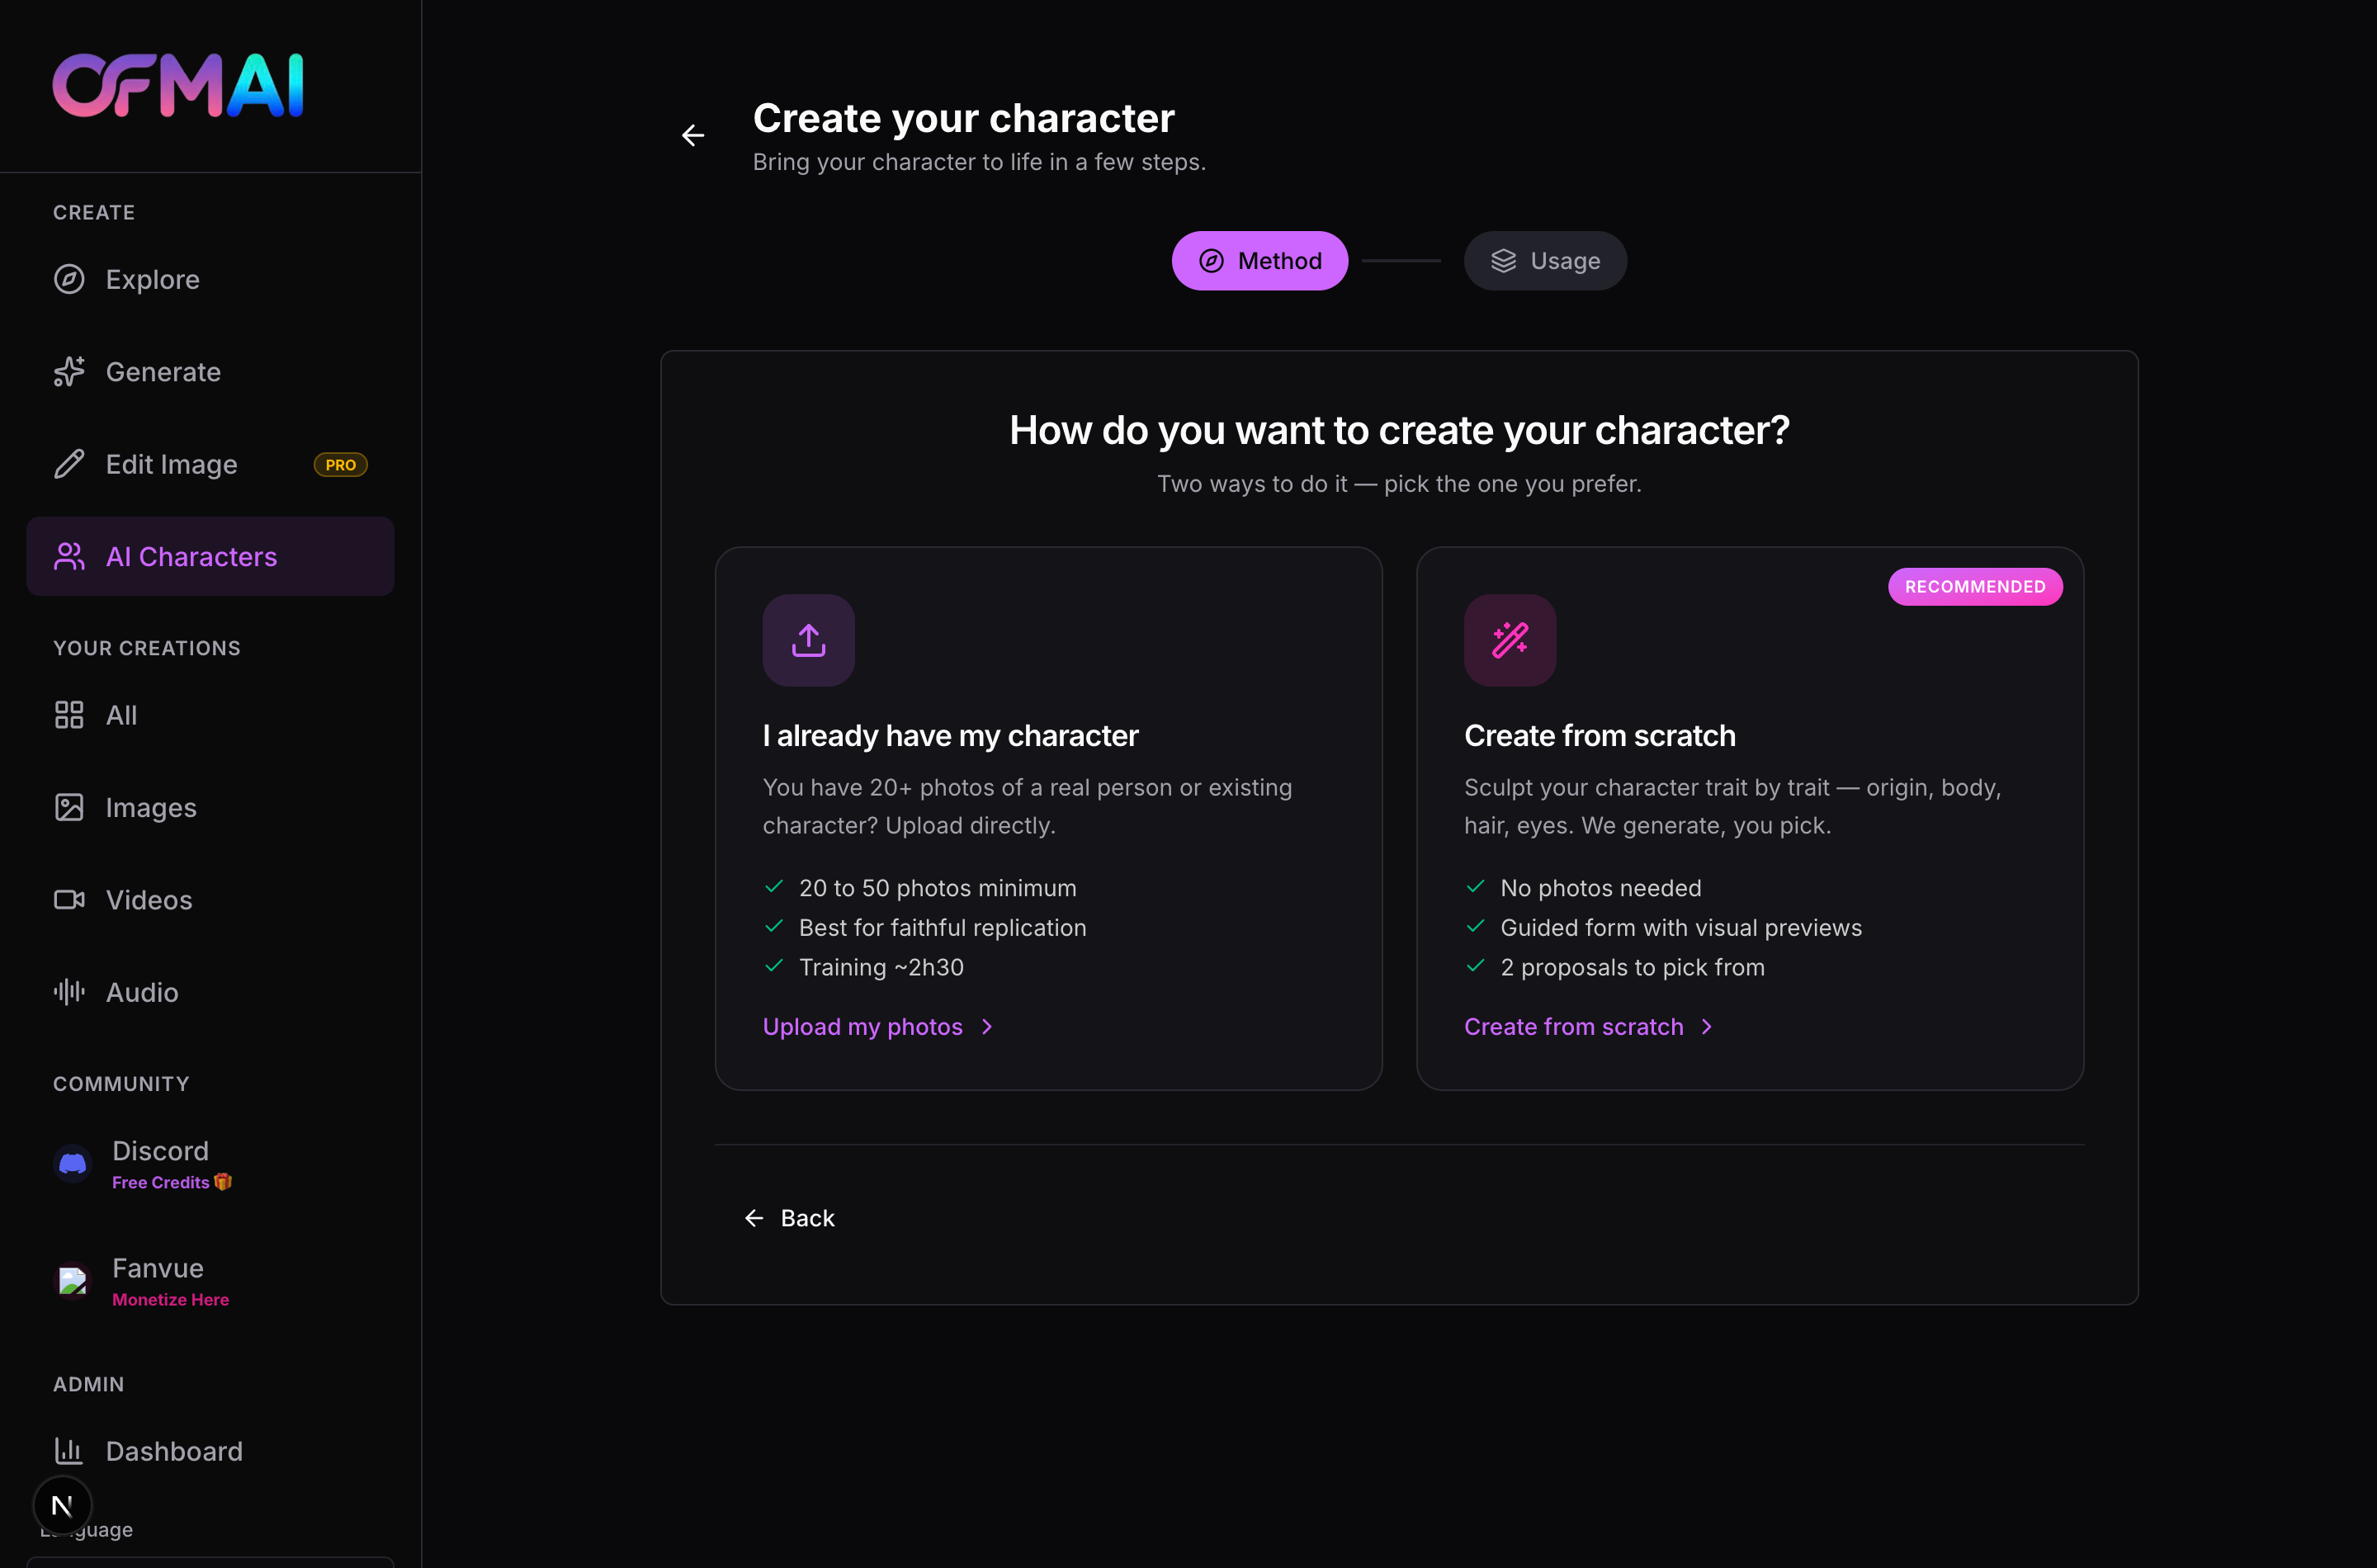
The very first screen of the character builder asks "How do you want to create your character?" and gives you two cards. One is for people who already have photographs of the character they want. The other is for people inventing someone from nothing. The screen presents them as equals; they are not, and the difference is larger than it looks.
This lesson lays out what each method actually demands of you, what each costs, and which situations genuinely call for the upload route. The short version is that from-scratch is the default for a reason and most people should take it — but there is a real case for uploading, and it is worth understanding rather than dismissing.
What the two cards say, and what they mean
The left card is titled "I already have my character" and describes uploading photos of an existing character directly. The right card is titled "Create from scratch", carries a Recommended badge, and describes sculpting the character trait by trait — origin, body, hair, eyes — with the system generating and you picking. Its bullets promise no photos needed, a guided form with visual previews, and two proposals to choose between.
The distinction is not really about effort. It is about where the character's identity comes from. On the upload route, identity comes from your photographs and the trained model's job is to reproduce it faithfully. On the from-scratch route, identity is invented during the build and the model learns it from images that were themselves generated. Both produce a character that holds its look across future generations; they differ in how much of that look you controlled and how much you inherited.
The upload route: how many photos, really
This is where people guess wrong, so here is the verified number. The uploader accepts between 10 and 50 photographs, and the counter under the drop zone reads "{n}/10 min" — you cannot continue until ten have finished uploading successfully. The drop zone itself is labelled "Add 10 to 50 photos of your character", with the guidance "Varied angles & lighting, face clearly visible". Note that the summary card back on the Method screen still advertises a 20-photo minimum; the uploader is the authority, and it enforces ten.
Ten is the floor, not the target. Every additional usable photo you feed it improves how well the trained model generalises to poses and lighting it has not seen. Twenty to thirty varied shots is a sensible working range. Fifty is the ceiling and there is no way to exceed it.
Variety matters more than count. Ten photos taken in one session, in one outfit, under one light, teach the model that outfit and that light as if they were part of the character. Ten photos across different days, distances, indoor and outdoor, teach it the person. If your folder is one photoshoot, you have fewer usable photos than you think.
The second half of the upload route, which nobody expects
Uploading the photos is not the last thing the upload route asks of you. Once your ten-plus images are in and you press Continue, the builder switches to a second screen headed "Pick your 3 SFW reference photos", asking you to choose, from the images you just uploaded, one for each of three slots: Face front, Full body front, and Full body back.
Three empty placeholder cards sit on the screen with the prompt "Tap to choose". Tapping one opens your uploaded library; clicking a photo assigns it to that slot and closes the picker. A photo already assigned to another slot is flagged so you do not use the same image twice by accident. All three must be filled before the final button, "Start training", becomes active.
This is worth knowing before you start uploading, because it changes what you should include in the folder. Your set must contain at least one clean straight-on portrait with the face clearly lit, at least one full-length shot facing the camera, and at least one full-length shot from behind. If your folder is all portraits, you will get to this screen and be unable to finish. Those three reference shots do real work downstream — they are what later video and remix features use as the character's canonical appearance.
What each route costs
The upload route is 15 credits, charged once at the end. There is nothing to generate — you supplied the images — so the entire cost is the training run itself. It is billed when you press "Start training", not while you upload.
The from-scratch route is 50 credits for a clean run, spread across three deductions: 6 for the pair of face candidates, 6 for the front and back body shots, and 38 at the final confirm, which covers seven automatically generated lifestyle photos plus training. Retries add to that — another 6 per extra batch of faces, 3 to re-roll one body shot.
So uploading is roughly a third of the price, and that is a real argument. But the 35-credit gap is not the whole comparison. From-scratch requires nothing but twenty minutes of choosing traits. Upload requires you to already possess ten to fifty varied, well-lit, consistent photographs of one subject, including a back view — and if you have to go and shoot those, the credits you saved are the cheapest part of the exercise.
Which one you should actually pick
Take the from-scratch route if you are inventing a character. That is the overwhelming majority of cases, it is why the card carries the Recommended badge, and it is the only route that gives you deliberate control over the look. You choose the origin, the hair, the eyes, the proportions, and you get two proposals to choose between at the face stage with cheap retries if neither lands. Nothing about it requires a camera.
Take the upload route if you already have a body of photographs of a specific character and reproducing that exact look faithfully is the point — you are continuing something that already exists rather than starting something new. The card's own bullet says it plainly: best for faithful replication. If that is your situation, the 15-credit price and the skipped generation steps are a genuine advantage.
One boundary that is not negotiable regardless of route: you may only build a character from photographs you have the right to use. Photographs of a real person require that person's informed consent. This is not a soft guideline — it is the line that keeps the whole thing legitimate, and it does not move.
If you are torn, build from scratch. It is cheaper to be wrong there. A from-scratch character you dislike cost you 50 credits and taught you what to change; an upload-route character built on a weak photo set cost you 15 credits and a photo shoot, and the fix is another photo shoot.
The two methods side by side
Everything below is what the builder enforces, not what the marketing copy on the cards suggests.
| Create from scratch | Upload my photos | |
|---|---|---|
| Photos you must supply | None | 10 to 50, uploaded successfully |
| Must include a back view | No — it is generated for you | Yes — a full-body back shot is a required slot |
| Steps after Usage | Portrait → Body | Photos → Pick 3 reference shots |
| Credits | 50 for a clean run (6 + 6 + 38) | 15, charged at Start training |
| Cost of retrying | 6 per face batch, 3 per body side | Re-upload is free; only training is billed |
| Control over the look | Full — every trait is a choice | Inherited from your photographs |
| Best when | You are inventing a character | You are faithfully continuing an existing one |
Frequently asked questions
- How many photos do I really need to upload?
- Ten is the enforced minimum and fifty is the maximum. The counter under the drop zone reads out of ten, and the Continue button stays disabled until ten images have finished uploading without error. Be aware that the summary card on the previous screen still says twenty — the uploader is what actually governs, and it lets you through at ten. That said, ten is a floor rather than a recommendation. Twenty to thirty is a better working range, because a trained model generalises from variety, not volume: different days, different distances, indoor and outdoor, a mix of portrait and full-length. Ten photos from a single session in one outfit will teach the model that outfit as though it were part of the character's identity. And remember the requirement that catches people out — your set must include at least one full-length shot taken from behind.
- Why does the upload route ask me to pick three photos at the end?
- Because three specific views do work that the rest of the training set cannot. After your photos upload, a second screen asks you to assign one image to each of three slots: Face front, Full body front, and Full body back. Those three become the character's canonical reference shots and are used directly by features that need a known starting appearance rather than a freshly generated one. All three must be filled before the Start training button activates, which means the composition of your upload folder matters more than its size. A folder of thirty flattering portraits will get you to this screen and strand you there, because there is no full-body back view to assign. Check for those three shots before you start uploading rather than after.
- Is building from scratch worse than uploading real photos?
- No, and the builder's own Recommended badge sits on the from-scratch card. The two routes optimise for different things. Uploading optimises for fidelity to photographs that already exist — if you are continuing an established character, that is exactly what you want and the 15-credit price is a bonus. Building from scratch optimises for control: you decide the origin, skin, eyes, hair and proportions, you see two proposals before committing, and cheap regenerations let you converge on a face you actually like. The trained result is equally consistent either way; what differs is whose decisions produced the look. For anyone inventing a character rather than reproducing one, from scratch is both the better fit and the only route that does not require a camera.
- Can I switch methods after I have started?
- You can go back, but the tail of the funnel resets. The method you choose on the first screen determines your entire route — from-scratch gives you Portrait then Body, upload gives you Photos then the reference picker — so switching means the steps you completed on the old route no longer apply. Anything you already paid for is not recovered, since the images were produced. In practice this only bites on the from-scratch route, where face candidates and body shots cost credits. The upload route bills nothing until you press Start training, so abandoning it costs you upload time and nothing else. The safer habit is to decide at the first screen using one question: do you already have ten or more varied photos including a back view, right now, without shooting anything? If not, take from scratch.
Related reading
Pick a method and start
No photos and an idea? Build from scratch for 50 credits. A folder of ten or more varied shots including a back view? Upload for 15. Either way the character you end up with holds its look across everything you generate afterwards.
Start free